My inspiration was 'the button' (see post from earlier) and a video I saw on Beads Baubles and Jewels (of course I can't find it now) and then the true inspiration came when I saw this video:
http://blog.craftygoat.com/2008/01/video_how_to_make_button_molds.html
which was particularly good because it showed how to deal with the shank (embed a jump ring BEFORE de-molding). I wrote to Angela with a question about baking with a shank (in a bed of cornstarch which has worked well for me) and she wrote back with encouragement. I bought her book but it isn't here yet and I'm galloping along without it. Hope it arrives soon!
So in my earlier post you saw my first try, which didn't work well, and my second try which came out much better.
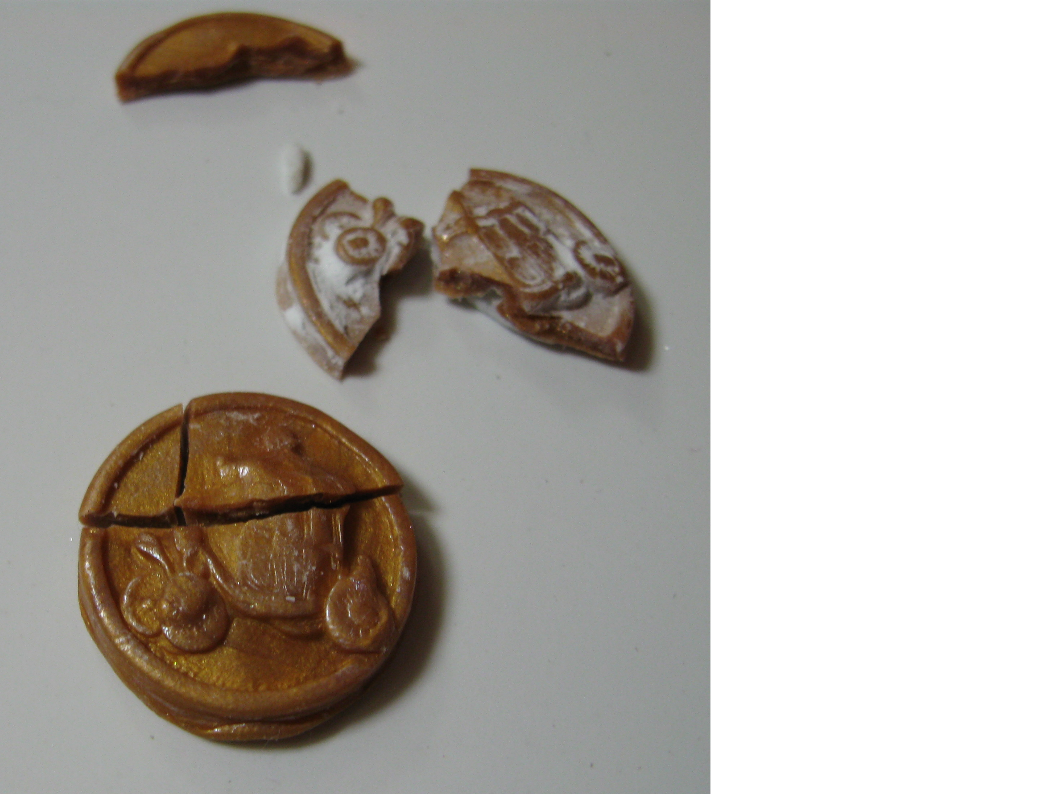
Here are some molds I've made with the original button and the resulting copies:

Notice how I used only the central part of the first one... and I put a hole in it to use as a pendent or charm.
I learned while teaching myself bead work that every piece is a lesson. I'm learning SO much. Also notice the copper color in the 'Cinderella coach' mold. this is from PearlEx powder. One site said to use it as a mold release. I didn't like this idea for a couple of reasons:
- the 'release' effect caused the button to come out of the mold before I was ready. I have not had a problem with clay sticking in these molds.
- all of the powder didn't come out and now it is hard to get out, but comes out on the buttons.
So I won't be trying that again.
Another way to apply the PearlEx is with a fingertip. My fingertips must be larger than average... I end up with the powder on parts of my finger that I can't angle properly to apply where I want. The powder seems to get everywhere.
When I put the powder in the mold I used a q-tip. I think I'll use that when applying the powder next time to see if that goes better.[Later: It did not go better! With a finger it goes only on the raised part. With a q-tip is gets between and causes a different effect. I keep getting it under my fingernail... I think I'm trying to go too fast. Patience!]
OK, now things get fun. I watched TONS of videos while waiting for my supplies. Mostly from PolymerClay TV:
http://polymerclayproductions.com/
Ilysa and Kira are great. Their videos are interesting and well done. They also vary quite a bit. Sometimes it is mixed media, other times it is very basic 'how to' stuff with clay. I have not found a place where I can just go through them in order. I found myself at YouTube and just sort of watching randomly. At first I wanted the basics and now I find myself going back to watching the more advanced ones again.
They have taught me so much and Ilysa even visited my blog. She probably doesn't have time to read all this but if so, Hi Ilysa!)
Two new terms I found:
- cane: these are 'logs' of clay, usually with a design embedded inside. Everything from a simple 'bullseye', to a spiral, to a kaleidoscope, and more is possible. I'm doing very basic things now but hope to learn more.
- Skinner blend: Named for Judith Skinner, this clay sheet starts with two separate colors which are blended cleverly into one continuously varying sheet. I've tried making a few but somehow I do something wrong at the beginning most times and end up with something very long and skinny. A couple of times I've done it correctly and it is cool, but even when I mess up, I've been able to use the result anyway. This learning phase is fun! If I get something I didn't expect, I use it anyway. This is helping me see things differently and transform my attitude.
As I'm learning 'more is possible' is an often used phrase with polymer clay. Another great line is 'nothing is a mistake'. I think this may be 'my medium' :) And Ilysa says 'Have fun with it!'.... I am!
So, Ilysa's video about putting clay on glass got me excited on Saturday so I found a blue glass dish that was given to me (from the same friend who liked the 'Cinderella button', Hi Linda!) and tried covering it with clay:

It doesn't look like much, but parts of it are very nice. Notice the black spots on the top on the left... this was very close to the element in my toaster oven. I've since turned the shelf upside down to give a little more head room. I really like the copper color on the base with the texture. I actually made the color by mixing PearlEx powder into the clay. I wish I'd put a contrasting color of PearlEx on it... but I'll be making more like this so I'll do it on those. This was a test piece. I made a simple cane and cut slices off it but then ran out before the piece was covered. So I made another one, but they are very different. From another angle you can see the dark outline of the second cane better:

I was very pleased with this test. I liked the way the light shone though the translucent clay but the small dish made it difficult to see this.
I tried again using another dish from the blue set, this one is just a plate:

It looks like slices of agate or something. I am just loving the way the texture is visible through the translucent clay. I put some translucent into each color. In part to alter the color but also I have a big block of translucent and not much of anything else.
In this piece, the color is all from the glass. the clay is shades of grey/silver.
I also stretched the slices of cane in the pasta machine. Different thickness when slicing produced different effects after stretching. Using a roller it was easier to keep the slices round.
I went out to the store and found a bunch of inexpensive glass to try covering. I also got some additional clay colors.
As soon as I got home I made this:


It still looks pretty good. That first dish doesn't look as good with the lights on.
After that I made another one:

This looks blue too but it actually purple with a lot of pearl(the stuff that won't condition by itself) mixed in. This piece is not baked yet but I just love how I made the spiral cane into a square... I just formed it that way... this stuff is amazing!
I don't like the diamond texture as much as the swirly texture on the other piece but I thought it would be good with the way the square spirals are arranged in a diamond pattern. I also smeared a lot of PearlEx on the texture to make it pop, but maybe too much. We'll see after baking. I think it might need a band at the top too.
So that's about all I've done so far. If I keep this up I'm going to need more clay soon.
I'm a little worried about ordering from Amazon again. Those big bricks are nice and the price is good but one of two bricks I ordered had a problem. I've read that quality can be a problem due to heat and storage in warehouses.
I went to the store Sunday and bought some 2oz Fimo clay blocks. Some of them say 'soft' on them. Mixing these with the 'bad' Pearl block makes a nice usable clay that works ok in canes. I didn't mention it earlier but until yesterday, all the clay I had was Kato.
Off to do a few chores and then more clay!