Monday I woke up feeling strange. Achy all over. Had a fever in the afternoon. Stopped most activities and took it easy for a couple of days. Seems flu-like but is not progressing to nasal and/or respiratory symptoms. If I don't rest I get tired and headachey... it feels so good to lie down.... But I feel a little better today (day 3 since starting to feel bad).
But progress in the beads room continues.
A coat of sanding sealer was applied and sanded yesterday.
Now it is time for me to decorate the counter top.
I found a printable 50" ruler, many different charts of bead sizes, wire gauges, knitting needle and crochet hook sizes, etc.. Also, some inspirational beading phrases:
The plan is to use ModgePodge to attach them to the wooden counter, then 'decoupage' over them. But this could get tricky. Don't want:
- ink to run
- bubbles to form
- have it look messy
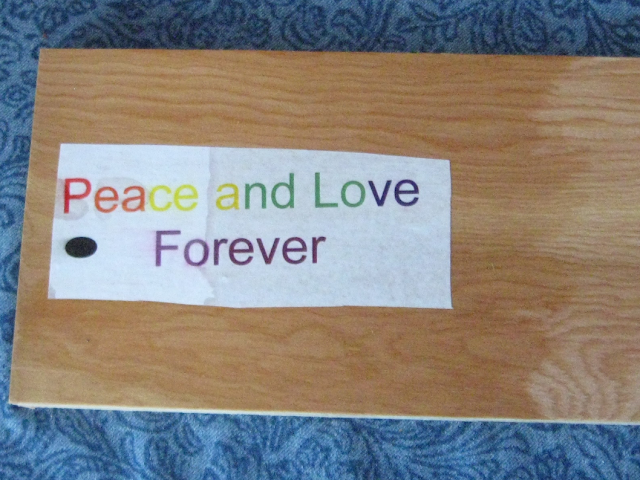
So we decided to try test. I printed a test piece using my ink jet printer into regular paper. I made it rainbow to test several colors.
I applied ModgePodge to the back of it (but I noticed I had to brush beyond the edges of the paper to ensure I'd covered it all... so the surface I was working on ended up with sticky places with MP on them) and applied it to the prepared wood.
We let that dry for a while (30 minutes?)
Next, I covered half of the paper with MP and left the rest dry. We let that dry about another 30 min-1 hour. I noticed the ink ran a bit from the Modge Podge.
Next my husband painted the whole thing with oil based urethane.
Here's what happened:
The left side was covered in ModgePodge. The right side was dry. The urethane is still wet. Notice the darker spot on the left near 'Pea'. This was a place where the urethane somehow got through to the paper. Incomplete coverage w/ MP I guess. Or incomplete coverage underneath.
I kind of like the translucent effect of the paper.
Notice the colored ink did not run when urethane was applied.
The ink near the 'For' is blurred off to the left. Kind of hard to see in the image.
This morning (12+ hours later) it looks like this:
Next trick is how to paint the back of each piece of paper w/ MP and placing them on the counter top without:
- getting MP on the front of the paper
- gooping up the counter top w/ unwanted MP
I think I'll keep a wet towel handy for keeping my fingers free of MP.
I'll use wax paper under the pieces of paper as I apply the MP making sure to use a dry piece of wax paper each time. I might go through a lot of wax paper but that's ok.
I'll line up the pieces of the ruler along the edge between the plywood and the trim.
I think the ruler is going to be the trickiest part. I've got 3 of them 50" long each. There are 7 segments per ruler.
Here's a picture of some of the pieces in place:
This is going to be a challenge but I think if I prepare well and take my time it will work.
Tune in next time for the results.


No comments:
Post a Comment