Funny to have nostalgic feelings about a year I don't actually remember.
But somehow, when I was in high school, 1950's rock and roll nostalgia was rampant. My first concert was in about 1971 or '72; Sha Na Na playing at a local high school gym. We did Bye Bye Birdie for a musical that year and I sang backup in an attempt at a 50's band that never got off the ground.
So my friends and I are turning 60 this year and a theme party is coming up, a '1957' theme.
Everything from music to food to clothing styles.
I've offered my collection of 45RPM vinyl records and a record player(never throw anything away! :) )
...and to make some 'clip-on' necktie thingies I'd conceived in my head. Later I thought, why not just tie on a necktie? But I decided to try the idea I had.
I bought some plastic headbands and some necklace sized memory wire.
I dug out some white fabric and decoded and combined instructions from online and a book I had to make a white men's shirt collar, with the opening in the back. I combined the collar and band but maybe next time wouldn't do that.
Maybe I could make a band that is one piece across the front and stuff the collar part in the seam... seems WAY easier than the one piece I made at first.....
Also, in my first prototype I put stiff interfacing in both outside and lining which turned out to be too much. Second time around only stiffened one piece of the collar and none in the band
I had a bunch of ties but they were all wide.
I bought a few more online and they were wide also.
One I had was pretty skinny(then I did some research and it seems ties were not so skinny in 1957) so I used it for the first prototype.
I took my collar with the plastic headband going through it, tied the tie,
then slipped it onto the collar and tightened it.
It took several tries to get the tail short enough...
I don't have much experience tying ties.
I ended up with extra tie fabric in the back and let it stick out.
After adjusting and fiddling I liked how it looked and cut the tie in the back.
I stuck the tails into the back of the collar and sewed it shut by hand.
It came out ok but is too stiff as I mentioned.
So for the rest of the ties I wanted to make them narrower.
It turned out to be relatively simple.
I undid the stitching on the back of the wide end of the tie, enough to make the interfacing loose, open the wide end of the tie completely, turn it inside out, and iron it flat.
Then I used the skinnier tie that I already had for a pattern on the interfacing and cut off the extra, up to the point where I could blend it in with the skinny end of the tie. I also cut off about 1/4" of the length but I'm not sure I needed to, it was just ratty.
I pinned the interfacing onto the tie and sewed a new point to fit the interfacing.
I turned the point right side out and folded the 'inside' side of the tie across the back and cut off any excess. Then I double folded the other side to cover the first side, making sure the new point shape is even.
Press and sew up by hand.
And it looks not too bad! Now I'll try it on the second prototype collar......
Voila!
How many of these should I try to make? I've got over a dozen ties but will poop out before I make that many.
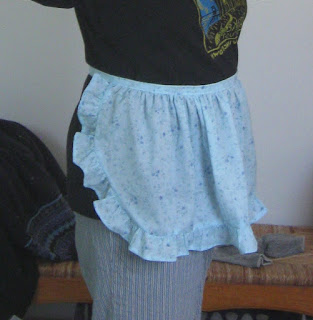
I was also thinking of making some tie-on aprons. I don't think my mother had any left, but they should be easy enough to make a couple.
I could use this as a chance to learn more about my new Singer 7258 by trying the gathering and rolled hem attachments.
First try not all that great:
but not terrible either. Just a little small for me.
Remember when mothers had a dozen or so of these aprons, to cover their lovely dresses that they cooked in! There were even 'fancy' ones to use when serving, and holiday themed ones.
I have none of these from those old days. I have a couple of aprons but they have a bib and are more like chef's aprons.... mostly hand made though. :)


No comments:
Post a Comment