Remember this button?
A friend at worked saw it and loved it.... I actually found another one that didn't have nasty paint all over it.... and I gave it to her. I didn't know what I'd do with that one button and I had so many. But I loved it too. It looks like a Cinderella coach... but it is actually an early automobile. It is plastic so I knew it wasn't valuable or antique. I looked for more info and found out in the 60's they made buttons like this for 'car coats'. Which was a short-ish coat, to be worn in a car... easier to get in and out of the car, I guess.
Anyway, while watching Beads Baubles and Jewels I saw a bit on using molding compound and polymer clay to make duplicate buttons.... Aha!
Of course, this meant getting 'into' polymer clay...... is it something I want to try? I seem to just go from technique to technique and never settle on anything.
But the button jewelry goes nicer when there is more than one of a particular button and I have a lot of nice, single buttons.... so I put the supplies in my 'cart' at Fire Mountain Gems and realizing I hadn't bought anything from them since last July I decided it would soon be worth splurging.
In parallel I was planning another month-long leave of absence from work. When that came through I decided to make the purchase.... after thinking about it for another weekend.
The 12 lb package arrived last Tuesday and I spent all evening and the next day sorting and repackaging it all... luckily there was a blizzard, and I spent the whole day with the supplies.
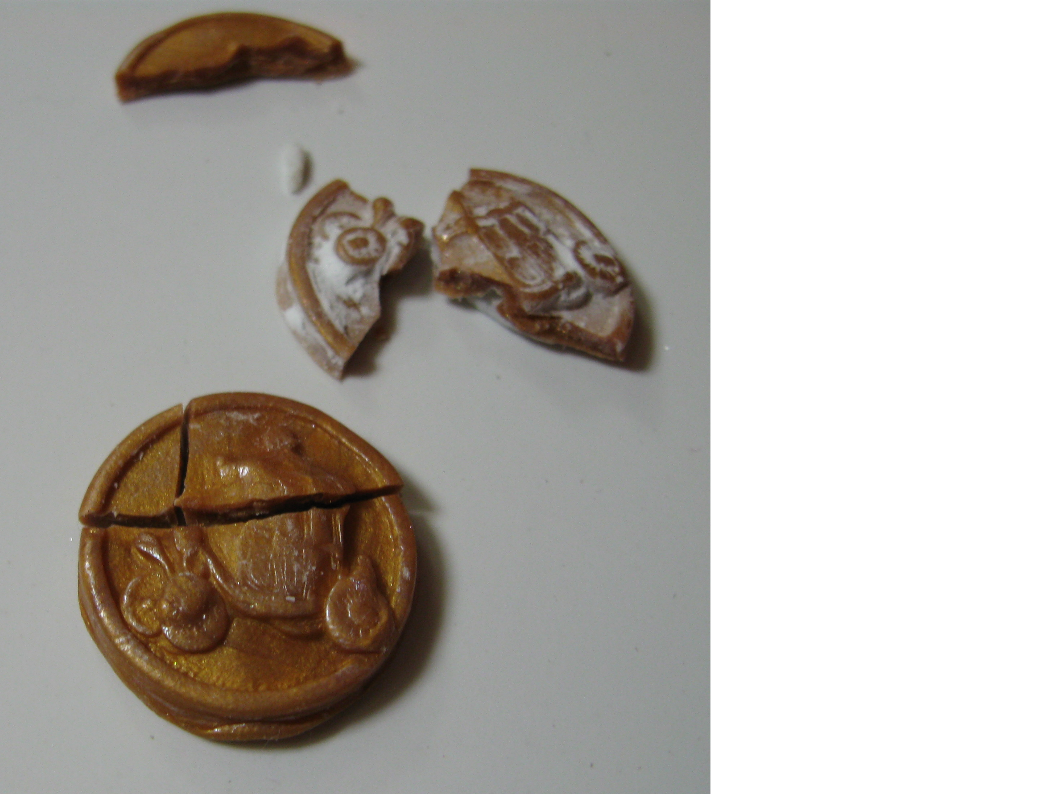
By the end of the day Wednesday, I had made a mold of the button above, and even tried filling it with a gold-ish colored clay. I'd mixed it with some of the 'concentrated colors' of Kato and some translucent Kato. I used a jump ring for the shank. I brushed the tops with some PearlEx and they looked very cute.
I looked up how to fire them with the shank and the design on the front and decided to put them on a bed of baking soda.
I bought myself a small toaster oven and tried baking them.... 300 degrees for 10 minutes. They seemed hard so I took them out.
Later I wondered how strong they were and to my dismay, they broke easily! :(
Somewhat discouraged I did more reading and I believe I didn't cook them long enough. While 10 minutes is what it says on the package, when I read what people say about their own use they say 20 or 30 minutes.... as long as the temperature isn't too hot, the clay won't burn.
Another problem may have been the concentrated color clay I mixed in.... too much concentrate? Not mixed in well enough? At any rate, I never expected to have them come out perfect the first time.
Undaunted, I pressed on. I made up more clay, silver this time*, and tried again with a longer bake time.
Here are the results:
Aren't they adorable? These are brushed with a blue/pink PearlEx. The one second from the left looks like it could use some sanding. I'll also admit, I haven't tried to break one of them.
* Silver - My big block of Pearl colored Kato is flawed. It won't condition. I tried adding some liquid clay to it (I only had black so I ended up with grey after mixing it into the pearl) and finally got it to behave a little better and used it for these buttons.
The original button was black w/ silver. I bought only a small block of black clay. I'll get to the black button copies soon.
That's enough for my first post in my new leave of absence. I actually have several posts to get to.... stay tuned!


No comments:
Post a Comment